Showing posts with label Baby Buggy. Show all posts

Wednesday, December 8, 2021

Buncha Mini (Diaper) Cakes - Craft Fair Prep from How Long Ago?

Since I'm catching up on my older diaper cake creations, here's a collection...

Several years ago, okay, it was like, 8 years at this point, I was getting prepared for the annual craft fair that I participate in. I was having some issues because I didn't have a lot of inventory but at the same time, I had noticed that my larger cakes just never sold well. I'm not sure if it was a matter of people wanting something more specific or they just weren't able to get something at that price point. So, I came up with an alternate plan.

I decided I wanted to create some diaper cakes with as much impact as the full size cakes, but make them half the size. I already had some 1-tier cakes, but I wanted to make some 2 and 3-tier cakes as well as making some diaper buggies since those sell regularly at the fair.

So, first up is the 2-tier cakes. I created 3 diaper cakes.

The first diaper cake was a cute little boy puppy cake. I used an adorable plush dog I had and matched it up with some puppy blankets. Along with some blue and brown ribbon and baby items, I put together this cake that had 20 diapers which is half of the normal amount for a 2-tier cake. I finished it with some dog die cuts that coordinated with the other decorations.

The second diaper cake I created was a 2-tier lion cake. This cake was a girl cake using pink, light brow, and cream to go along with a little lion plushie I had. Since the puppy cake was a covered cake, I decided to make this one a "naked" cake where the diapers were exposed. I added some pink and cream colored ribbon to the tiers. I included some pink baby items on each of the tiers. Lastly, I added some lion die cuts as inspired by a lion cake I had made previously by request.


I was most excited about the third diaper cake which was a gender neutral cake. This diaper cake was giraffe themed - I love giraffes. I had a super cute giraffe plush and some giraffe print ribbon which pull this orange and brown cake together. I didn't add die cuts to this cake because the printed ribbon created a bit of a busy look and I didn't want it looking chaotic. I absolutely loved it. It was one of my favorite diaper cakes I created for this craft fair.

I already had on full-sized 3-tier cake in stock that was a brown and blue boy cake so I didn't feel the need to create a mini 3-tier cake as well. I just made a mini gender neutral and a mini girl cake to round out my offerings.

For my first 3-tier cake I decided to create a neutral cake. Per my decision to make half-sized cakes, this diaper cake had 30 diapers. I created a "naked" cake with a relatively common theme of ducks. I had some super cute wash cloths with ducks on them and a cute plushie for the topper. The orange and yellow colors kept it neutral. I did add some die cut ducks to this cake as well.


My second 3-tier diaper cake was another favorite for that year. I created a hot pink and zebra stripe cake. With a cute zebra plushie and some zebra print ribbon, I created another "naked" cake with the diapers exposed. I was especially proud of one of the decoration pieces which was a stacked bow placed on an alligator clip. It looked like it was just a bow for the diaper cake, but it was a real bow for a baby's hair. I added some more hot pink and white baby items as well as some die cuts. I'm not sure why the zebra print seemed less busy than the giraffe print, but it was so the die cuts looked just fine.

Along with the diaper cakes I also made three buggies to round out what I already had in stock. I made a pink girl buggy, a green neutral buggy, and a brown and blue boy buggie. They were the basic buggies that I make regularly which include 15 diapers to make the basic structure, along with a blanket and some other baby items.


For my prep for that show I also make a few other items, hair bows and baby beanies and I was ready to go.


Tuesday, May 5, 2015

In the Jungle...

I can't believe it's been over a year since posting a blog about the creation of one of my diaper cakes. Time gets away from us so fast! I'm going to try to get caught up again on my blog posts and give my awesome fans some more behind the scenes looks at my creations.

I was thrilled when I received a request for a Lion King set. There are so many adorable Lion King baby items and some great possibilities when it comes to accents that when I received the order request, I instantly started having ideas. I was even more excited that this order was the largest one to date. My customer not only wanted a large 4-tier cake, but she also wanted a coordinating buggy. I was pumped!

One of the pitfalls to doing licensed items on baby gifts is balancing costs. While these themes are so fun to work with, the costs can add up quickly. Like the previous LSU cake I had done, I had to consider the budget I was working with and make sure to include enough accents to ensure a uniform and identifiable theme while keeping costs down with coordinating, but not necessarily licensed baby items.

For this cake, I opted to create a more neutral base that was reminiscent of the Lion King baby items that were widely available. I kept with browns and greens and used these awesome blankets that had leaf patterns on them. They worked great with the leaf accents seen so frequently on Lion King paraphernalia. I also incorporated some giraffe ribbon which again was a common print seen with Lion King baby products.

Of course, I included plenty of Lion King officially licensed goodies including teethers, pacifiers, a soft book, and of course an adorable plush Simba for the cake topper. I also included a few additional washcloths, just to match the colors.

As final accents for the cake, I added some additional Lion King badges and leaf die cuts.

For the buggy which was made to coordinate, I used a matching blanket and the same ribbons I used on the cake. I included color coordinated washcloths as well. My favorite part was an adorable Simba lovey, that when positioned just right, made it look as though Simba was tucked into the buggy. I loved the effect it had! I also finished the buggy off with the same Simba badges and leaf die cuts so the two pieces were a complete unit.

Just like all my other gifts, this set became my new favorite. I love the opportunity to make the larger cakes because there is so much to work with. This cake had tons of items and visual appeal without going overboard and costing a fortune. My customer loved it, which is, as always, the best part of what I do.


Wednesday, January 16, 2013

Craft Fair 2012 Prep (Part 2)

As November and the annual craft fair drew closer, I still had a lot of work to do. I had most of the larger cakes I wanted to have available for the show, but I still needed a 2-tier boy cake and some buggies to replace ones I had sold. I also wanted to try some single tier cakes.

The two tier boy cake was one I was really excited about. I had some adorable sporty blankets in stock and I was thrilled to be able to use them. I used the colors red and blue as accents and created a super cute 2-tier cake complete with little baseball shoes on top. I also found some bath squirters that were shaped like sports balls and couldn't pass them up. Add some sporty accents and ribbons and I had a truly adorable cake for anyone's "Little Sport."

My next project was buggies. I had a gender neutral buggy on hand, but was in need of a blue one and a pink one. These are great little gifts and very popular because they contain a lot of baby items in a small package. I used some single blankets I had for these and used solid wash cloths to pair with patterned blankets. I have slightly changed the way that I make the structure of the buggies so they are easier for the expectant mama to use, but the changes are only internal and the exterior of the gift looks just as adorable as always.

After the buggies were done, I was happy to find that I still had some time to create some 1-tier cakes for the craft fair. For these, I was able to use some extra diapers that I had trouble putting in other cakes (because I don't typically mix brands - but will if requested). I made three 1-tier cakes, boy, girl, and gender neutral. These cakes were single layer with 10-15 diapers, a blanket, and several baby items added to them. They were each topped with paper shred for a complete simple gift. They really rounded out my offerings for the craft fair.


With the cakes finished (and finishing a rush order I had in the middle of this - keep an eye out for that blog), I had just enough time to put together a cake for donation. The craft fair always sponsored a raffle where they asked vendors to donate an item to the raffle. For this cake, I made up a 2-tier gender neutral mini cake that was green and yellow and contained many baby items. It was a great gift on it's own and a mini version of what you'd expect on larger cakes that I make.

I was finally done with all my items for the craft fair. It took a lot of time and creative scheduling to make it all in the time I had allotted. I hope for the 2013 show, I'm better prepared and don't quite have the time crunch. I'm happy with how these cakes came out and I'm happy for the opportunity to create more cakes to show what I can do.

Thursday, September 13, 2012

Choo-choo - Take Two

The original train cake with
bold blues that matched the
shower colors as well as the
 bouquet and candies that
completed the set.
Not long ago I was contacted by women who was looking for a basic boy diaper cake. She sent me a picture of a simple cake with a large bow on top. She asked me if I was able to make a cake similar to this. I let her know that I could certainly make a cake for her and I suggested that she check out some of the pictures on my Facebook page to see if any of the cakes that I had made previously struck her fancy. She responded that she really liked the train cake I had made previously (as well as a currently stocked buggy); but, she requested a few modifications. We were both very fortunate that the primary baby items included in that previous cake were still available so I was able to create a similar gift.

Adapted train cake with bow topper and
softer color tones.
The biggest difference in the cake that I made and the one that she wanted was that she didn't care for the paper shred. This, of course, was easy enough to remove from the design of the cake. The biggest challenge in that case was finding something appropriate to do for the top of the cake. I borrowed from the picture she had sent me previously and opted to add a large bow rather than the shred for the top of the cake. Another change for this cake was that I used basic baby blue and white for the primary colors of the cake. The original train cake included a lot of different shades of blue which was by request of the person who ordered it. For this cake she wanted very basic baby blues, colors that are very traditional for boy showers.

Car buggy with softer color tones
that compliment the train cake.and
create a cohesive "vehicle" theme.
I love that this cake not only demonstrates my ability to re-create cakes I've done in the past; but also that I am able to tweak the cakes for my customers' individual tastes. This cake turned out adorable and fortunately coordinated quite well with the car buggy that the customer requested to purchase as well. Of course, the best part of the whole project was that my customer loved the gifts that she purchased.

Thursday, July 5, 2012

Jungle Fever

Jungle themes in baby rooms are incredibly popular. As a result, I've created a number of diaper cakes and other gifts with jungle themes. I personally love them and can't wait for the opportunity to make more! I recently had an order for a buggy with a jungle theme.

For this buggy, I was hoping to make the design a bit more "mom friendly" as my traditional design incorporates rolled diapers which can be tedious to take apart for use. Fortunately, the buggies contain a modest enough number of diapers to ease the task a bit. In any case, I managed to create this buggy with a minimal number of rolled diapers and achieved a similar enough effect. The outer "basket" portion of the buggy was adorned with a jungle print crib sheet that matched items on the mom's registry. Washcloths from the registry were used to complete the hood and blanket of the buggy. Several additional washcloths were hidden within the buggy to improve the overall shape that was lost due to the alteration in design. Two pacifiers were added inside the buggy, also chosen from the registry. As a final touch, giraffe print ribbon and a washcloth flower were added.

For more ideas about jungle, jungle related, and animal themes, check out my posts on these baby gifts:

2-tier Giraffe Safari Cake
2-tier Lion Safari Cake
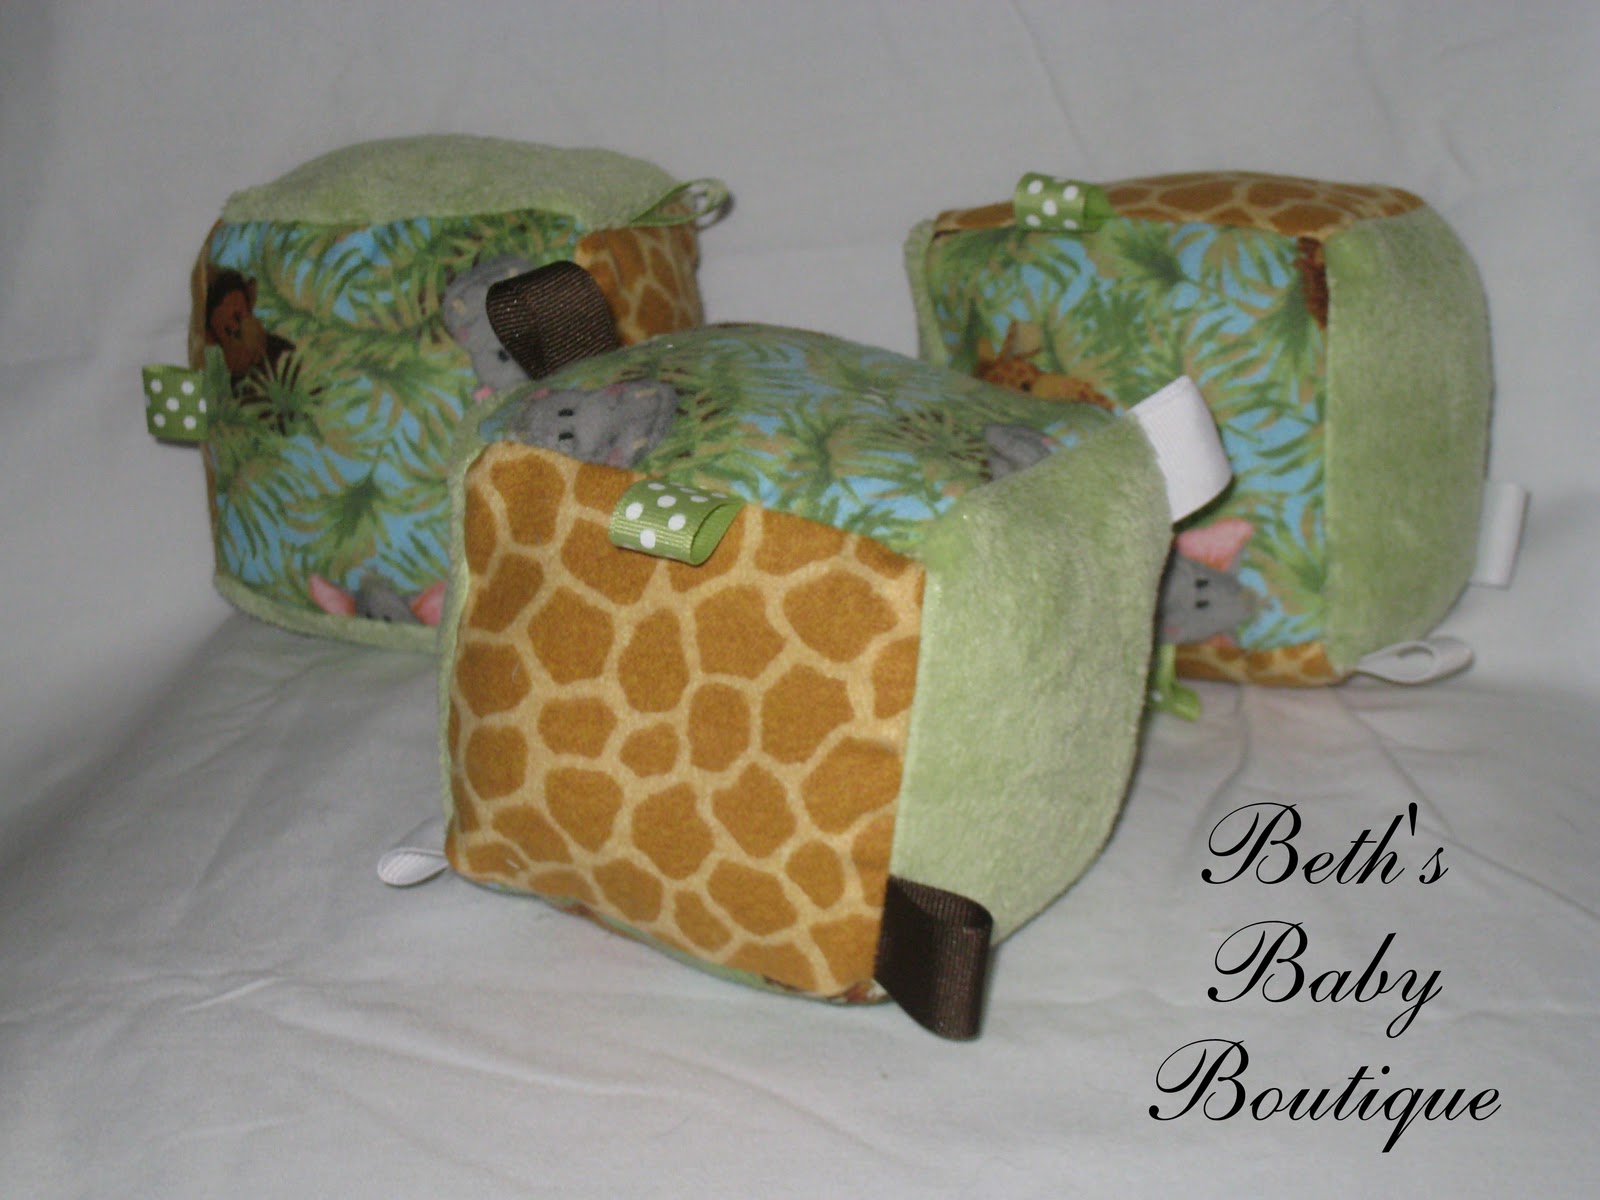
Jungle/Safari Taggy Blocks
Jungle/Safari Burp Cloths
3-tier Monkey/Flower Cake
2-tier Giraffe Print Diaper-free Baby Cake
3-tier Monkey Cake
Monkey Tricycle

As I mentioned, I'm excited about more jungle themes in the future and can't wait to see what challenges are presented to me.

Friday, November 18, 2011

Prepping for the Craft Fair

After finishing up my harvest diaper cake (and another order which will be written about after the shower in a couple of weeks), I needed to get to work preparing for the annual craft fair I do with my mom. This year would be my second year bringing my baby gifts to the show. I actually had some inventory left from last year, but I had sold a buggy at the show last year. I also sold one of my gender neutral cakes sometime in the middle of the year that I had in inventory from the show. I dismantled two cakes I had made for last years show to use some of the baby items for another cake. All those items needed to be replaced so that I would have enough at the craft fair.

The first cake I worked on was 2-tier girl cake. I was super excited about this cake. Ever since I saw the blankets I used for it, I knew exactly what I wanted to do. This cake, the "Cupcake Cake" features a cupcake printed receiving blanket, plus another coordinating blanket. The lower tier is lined with washcloth cupcakes. The topper for the cake is a large cupcake made with a onsie and a washcloth. All the cupcakes are topped with red pom pom cherries for effect.

The second cake I made for the show was a 3-tier girl cake, a butterfly cake. For this cake, I used two butterfly print receiving blankets and a coordinating green blanket with dots. To embellish this cake, I added washcloth butterflies and flowers. I also added pink flower shaped teethers to decorate. This cake incorporates a kind of washcloth flower I had never done before and I love the final look. While not in the pictures, I did at antennas to the butterflies before wrapping the cake for sale.

The third new item I made for the craft fair was a 2-tier gender neutral cake. This cake featured a duck patterned blanket, plus another coordinating blanket around the tiers. Added to this cake was a matched duck hat and mitten set. I also added a washcloth, some baby bath samples, and water filled teethers.

The final new item I made for the craft fair was a buggy. This buggy needed to be a boy buggy. I selected a car print receiving blanket for the main buggy basket. I added coordinating washcloths for the buggy hood and the "blanket" inside the buggy.


Along with these new creations and the other baby items I had in inventory, I was ready for the show. I had high hopes of improving on last year's sales. There has been a definite progression of my work over the past year and I was proud of many of the new cakes I had to offer. In my next blog post, I'll give an update on the show including pics, so make sure to check back!

Sunday, April 17, 2011

Versatility of Baby Buggies

Recently, a friend contacted me seeking a baby gift for a friend of hers. She wanted a buggy and while she started out saying anything was fine, after some discussion about specifics, we turned to looking at the expectant mom's registry. This really is my preferred method for developing baby gifts. I do have some ready-made inventory in stock which is great for last minute gifts, give-aways, auctions, moms who are unsure what they need or want, etc.; however, I feel customized gifts are more personal and take into account items that the mom wants (assuming she knows, of course). I never was particular about coordinating blankets with my little one's nursery, but many people are and by using registry items as a guideline, even if specific items can't be incorporated in the gift, a diaper cake, buggy, bouquet, or other gift can be made to coordinate and is sure to be a gift the expectant mom enjoys. Of course, ideally, registry items would be able to be used. This, luckily was the case for my friend's friend, though it did take me out of the box a bit and I incorporated registry items in new ways.

As I mentioned, my friend requested a buggy which are a very popular item since they are less commonly seen and tend to be more compact (and lower in cost) than a diaper cake but carry a lot of the same impact. I began "construction" with hand rolled diapers. The registry contained burp cloths which I felt could be incorporated beautifully where I traditionally use a blanket around the main structure of the buggy. A baby duck printed hat was used for the "blanket" in the buggy and matching baby mittens decorated the front. The hat and the mittens were both on the registry.

Aside from the use of the burp cloths and hat which were fun alternatives to my regular "components" I like that this gender neutral buggy stood out from the commonly seen green in gender neutral items. Yellow is, of course, also commonly used, but the beaks on the ducks printed on the hat and mittens really called for the use of orange on the buggy hood which really makes this buggy stand out. The printed hat allowed for the use of solid colors around the buggy and pulled it together quite well.

I also updated the packaging for the buggy in a small way. Buggies are presented to the mom-to-be (unless otherwise requested) on a cake board and shrink-wrapped. The wrapping is tied with curling ribbon and a tag is attached to let the recipient know what items are included in the gift. For this buggy, I included crinkle paper on the base to give it a more professional look. The effect turned out just as I had hoped and gave a great final presentation.  My friend seemed pleased with the buggy and I hope the expectant mom also enjoyed this adorable presentation of items she selected as well as a few extras.

Friday, February 18, 2011

Getting smaller

While most people are looking for increased growth, I took a moment to shrink down. Although, in shrinking, I'm growing. What does that mean? I've developed a smaller version of one of my most popular items - the Baby Buggy - and in doing so, I've created an additional option to compliment my other products.

In the early stages, on of my sisters-in-law asked me, "Why would you want to make a smaller one? Isn't the buggy small enough?" The answer? There is a place for it. The standard sized baby buggy is a great alternative if you don't want a gift as large as a diaper cake. Like the diaper cake, it can be used as a centerpiece for tables at showers and welcome baby events, weather you have just a gift table, hors d'oeuvre table, or tables for guests to sit and eat. As demonstrated in the past, the buggy is also the ideal size for a topper on a sheet cake. Of course using the buggy as a modest gift on it's own is always an option as well, because though smaller than a cake, it still provides plenty of baby items for the mom to be.

So, considering the versatility provided by the standard buggy, what uses are there for the Mini Baby Buggy? Plenty! Many of them coincide with the uses of the standard size but add dimension. In decorating for a shower or baby welcoming celebration (also known as a sip 'n' see), using multiple mini buggies around the gathering area(s) will add a little flair (and become useful instead of waste like a lot of decorations). These are especially useful if space is limited and requires smaller decorations. Standard and mini buggies can be made to coordinate or match a theme and be used in various places depending on the space available. For example, a standard buggy placed as centerpieces on tables for eating and mini buggies placed on the end back corners of your food table can make adorable, cohesive, and useful decorations for your event. Mini Baby Buggies can also be used as cake toppers for standard sized cakes (especially 2-tier cakes which have a slightly wider top tier than larger cakes). Two mini buggies can be used together as toppers for a sheet cake which is especially adorable if the mom is expecting twins! Of course, don't feel limited by my suggestions, these mini buggies can be used in any other creative way you choose!

Now that we've discussed their versatility, what goes into a Mini Baby Buggy? Well, like the other diaper gifts I have, the mini buggies start out with hand rolled diapers that form the main structure. With the prototype, I used two wash cloths for the base of the carriage, however, alternately, a burp rag can be used and will likely be used more frequently in this application. Wash cloths are then used for the other buggy components. Finally, the buggy is decorated with ribbon. Additional baby items may be added such as pacifiers or other small baby items, however the selection of these extra decorations is limited due to the size of the buggy.

How does the Mini Baby Buggy compare in size to the standard Baby Buggy? It is smaller, of course, but not too small that it doesn't provide a good variety of baby items for the new mom. As you can see in the picture, it is slightly bigger than half the size of a standard sized buggy.

I haven't worked out all the details of packaging and presentation for these Mini Baby Buggies yet. The standard size is presented in much the same way as the diaper cake. It is placed on a cake board, wrapped in shrink wrap, then tied with decorative ribbon. The presentation for the Mini Baby Buggy may be the same in cases where the buggy will be presented as a stand alone gift, and of course, when used as a cake topper as it will be wrapped on the cake. When used as decorations for a shower or party, the buggy may be wrapped or not depending on the preferences of the person who ordered them.

As you can see, they are still slightly in the development process, however, I feel confident in filling orders at this time. I am excited to add this item to my product line and ready to incorporate it with other gifts I make.

Wednesday, December 8, 2010

Buggy Order!

It seems the more the baby buggies are seen, the more popular they are becoming. Diaper cakes are still popular as gifts and centerpieces, but I think that the novelty is starting to wear off. It is hard to attend a shower without seeing one somewhere. So, while their popularity is wonderful, it certainly encourages new ideas and gifts. My buggies got a lot of oohs and ahhs at the craft fair I had participated in and a buggy sale was the only one I made that weekend. They are less common and since they are a little smaller, they fill a niche that was previously void - small, affordable, adorable, and clever.

I recently received an e-mail from a friend wishing for a small cake or gift to act as a centerpiece at a shower. She opted for a buggy. I was limited for time on this particular gift, so it made matching the mom-to-be's character nursery theme a little difficult (most of the character items had to be ordered online). Instead, we decided it would be best to create a basic boy buggy.

I approached this project with the idea that I'd use a basic non-themed design so as not to conflict with the chosen theme. I avoided items with pictures like cars and sports items and selected a simple striped design for the main portion of the buggy. I hand rolled the diapers to form the structure and added the details. To this buggy, I added a teether as well. I printed up character sticker labels which matched the nursery theme to apply to the decorative ribbon around the buggy. This gave it a personal touch for the expectant mom and allowed the additional detail without ordering specially made baby items (since I didn't have the time before the date of the shower) or ruining any of the items included in the buggy.

Overall, I think my friend was pleased. She mentioned that the buggy was for a centerpiece so I asked if she wanted it shrink wrapped. She said to go ahead and wrap it and they could undo it if they felt it would look better as a centerpiece. She picked it up a few days before the shower. I sure hope the expectant mom liked it. I'm happy to get those extra little challenges to see what I can come up with!

Tuesday, November 30, 2010

My First Craft Fair!

I seriously thought I had typed this up already, but apparently, I was wrong. About 3 weeks ago, I participated in my first craft fair with my baby items. I had done this craft fair in the past with my jewelry and dream catchers, but this was the first public event for my baby boutique.

My mom and I had worked this craft fair together for the past 3 years. She had worked it for years before that, but I joined her more recently. I like this one because there is a minimal fee for booth rental and then a portion of your sales goes to help the youth group (the craft fair takes place at a church/private school). If you don't sell much, you aren't out any more than the small investment to rent your space.

We like to set up in booths that run between aisles. This gives us extra space to display our wares, one table on either side of the booth area. One of my tables was dedicated to my diaper cakes and baby gifts.

The weeks preceding the fair, I drove up to the Dallas area where my mom lives and the fair took place. I didn't travel with many diaper cakes but worked on the projects there and ended up with three each of 3-tier cakes, 2-tier cakes, and baby buggies. For each type of baby gift I had a girl, a boy, and a gender neutral gift. I arrived with only the 2-tier gender neutral cake and the girl buggy which was my first inventory item.

I'll give a short description of the items I created for the sale.

Baby Buggies:
The baby buggies are made with hand rolled diapers to make up the shape. A receiving blanket, wash cloths, and burp cloth are added for the outer shape and pattern. Ribbon finishes off the buggies. I have made buggies with extra baby items on them, but all the ones I created for this craft fair were the basic buggy design.


2-tier Diaper Cakes:
I arrived in the Dallas area with a gender neutral 2-tier diaper cake. This cake was a bath themed cake that included hooded bath towels, wash cloths and baby bath items. To add to that, I built two additional 2-tier cakes: one boy cake and one girl cake. The girl cake  was a mint green, pink, and lavender cake that had receiving blankets, wash cloths, teethers, and a rattle included to decorate the hand rolled diaper structure. The boy cake meant entering new territory for me since it was the first time I had incorporated a bottle into one of my diaper cakes. The boy cake included receiving blankets, wash cloths, and pacifiers plus the bottle to decorate the hand rolled diaper base.


3-tier Diaper Cakes: 

I had to start from scratch on my three 3-tier cakes since I didn't even have one to start my display for the fair. The girl cake included the most diapers since the blankets used were larger than standard receiving blankets. Hand-rolled diapers formed the tiers for the cake which were then decorated with the blankets. Teethers, socks, and wash cloths were added and a carrier toy topped the cake off. The boy cake looked to be the largest because the diapers I used for it were size 3. I will typically use size 1 diapers in my cakes, but occasionally there will be a reason to use larger ones and that is what I had in stock. The boy cake, again incorporated hand-rolled diapers that were stacked for the tiers. I had a great set of navy blue blankets for this cake and I love the way they look on the final product. I added socks, wash cloths, baby powder, and a carrier toy to finish the cake. My 3-tier gender neutral cake was the standard green and yellow. Hand-rolled diapers created the structure which was then wrapped in coordinating gender neutral receiving blankets. I added teethers, wash cloths, baby bath products and a carrier toy to finish this cake.

 I was happy with the inventory I created for the craft fair and I only hoped it would be enough. I also brought along with me, my product catalog which demonstrates the other baby gifts I can make and a description of the items typically included in each one. My original plan was to bring shrink wrap with me and package the diaper cakes as they sold. I felt, and still do, that once they are wrapped, it is harder to see the detail on each cake, but that the wrapping is really necessary for the finished look. Since electricity was a potential problem (as in, we may not have any), I went ahead and started wrapping as many as I could. Unfortunately, I had a shortage of the shrink wrap, so only a few of the cakes were done. In the end, I decided it worked out better that way so customers could see the detail on the cakes without the wrapping and how the finished product looked. Each of the cakes was also accompanied by a card that listed the items included so recipients would have that information as well as my information which was printed on the back.

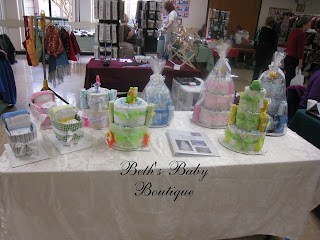
At the fair I felt I had a pretty nice set up. My display took of plenty of space without being too cluttered. I had a lot of positive response for my diaper cakes and multiple people asking for my card. Unfortunately, I didn't have any business card with me, but I figured it was just as well since I wasn't local to the area. Many of those interested loved my work, but said they didn't know anyone who was expecting currently, so I missed potential sales in that respect. I do wish that I had done a little bit better, but most of the vendors had low sales over the weekend. The most popular cake seemed to be the 3-tier gender neutral cake. I sold the boy buggy to a young woman whose boss is expecting a baby. I did enjoy my time there and I definitely hope to return in the future with my diaper cakes. In the mean time, I have a decent inventory in stock ready and available for sale. I also hope to find some local show and craft fairs that I may be able to participate in where I can get my name out, and this time, I have business cards ready to go!

Tuesday, August 31, 2010

Diaper Cakes with a Twist

With another friend expecting in August, I was lined up to make another diaper cake. This one however, had a different progression. I learned through a friend, that she and one of the hostesses for baby showers for this expectant mom were planning on making diaper cakes for her for her showers. This presented a little bit of a challenge for me. While diaper cakes are almost always welcome, I was a little worried about the novelty of the gift wearing out if mine was the third to be received. I felt I needed to do something a little different.

I developed a new concept for a diaper cake. This cake would be a sheet cake with a buggy topper. I started my search for supplies using the registry as I usually do. One of the items was actually a set of receiving blankets, two of which were the same pattern. This was vital for the cake as I'd need two  blankets for the surrounding decoration on the cake.

Hand rolled diapers provided the sheet cake. I was surprised at the number of diapers necessary to create the size of cake I was aiming for. Now, the cake didn't have the sharper corners I would have preferred to make it look closer to a real sheet cake, but it looked ok. I used two matching blankets for the edges of the cake and a third coordinating blanket for the top. The buggy was then formed to top the cake, using hand rolled diapers, a blanket, a burp cloth, and some wash cloths. Ribbons were then tied around the edges of both the buggy and the cake for embellishment. A pair of socks was added to the front of the buggy for an additional touch.  I used extra ribbon and tulle for the cake and kept it simple on the buggy topper.


I was really proud of how this cake turned out. It may not appear that way, but this cake took more supplies (at least 1 extra blanket and more diapers) than most of the others that I've made. This is a little unfortunate because for future purposes, it may carry a higher cost than more ornate diaper cakes. Aside from that, I was happy to be able to present a unique style of diaper cake as well as give items that were part of the registry. This made a fantastic eighth cake to add to my repertoire.