Friday, December 24, 2010

Tis the Season...

Since Christmas is nearly upon us, I wanted to step outside of the traditional blue and pink box and explore other theme options. Now, one problem I have run into is that there seems to be a lack of Christmas-themed (or other holidays for that matter) baby blankets. These provide a key component in what makes my diaper cakes stand apart from many others. Blankets, towels, sheets, or similar baby items create the design and main decoration for my diaper cakes and often form the foundation of a theme.

I decided to create a sample cake using some items I had to create a concept for future holiday themed diaper cakes. I was lucky enough to have a Christmas receiving blanket which provided the foundation for the cake. Another thing I wanted to experiment with was the size. I wanted to see how a smaller cake would look and see if it held the same appeal as the larger cakes. This could provide a spring-board for mini diaper cakes to fill the gap of customers that desired a less cumbersome cake or needed multiple cakes but needed to keep within a tighter budget.

Like with all of my diaper cakes, I started with hand-rolled diapers. The tiers were smaller in circumference, but I felt that the cake still needed at least two of them to give the same look as a larger cake. I used the Christmas receiving blanket on the lower tier and a red wash cloth for the upper tier (although, truth be told, it didn't quite fit and a future cake would benefit from two wash cloths). Holiday specific baby items are fairly easy to come by, but the variety is limited compared to what is typically found. I chose to use items that can be found year-round (with the exception of the topper) since I had them in stock - after all, this cake was for display and experimentation. White socks and a green pacifier provided decoration. A snowman topper was added as the final touch along with appropriate colored ribbons.

Over all, I'm happy with the way it turned out. The topper is a bit large, but still within an acceptable range for this size cake. I also like that despite that fact that this cake is much smaller, it still holds a lot of the same appeal that a larger cake would have. Major differences between this 2-tier cake and a standard one are fewer diapers (at least 10 less) and blankets or towels used (as this cake only allows for one larger item). The size mandates either a burp cloth or wash cloths for the top tier, which are, of course, wonderfully usable baby items. Smaller baby items like toys, teethers, etc. can just as easily adorn the sides of these cakes just as they would on the larger cakes, though size of the individual accents would need to be a factor so as not to overpower the whole cake. I believe this trial of mine was a success and in the future, I may continue to produce these mini cakes along with the larger ones and other gifts I make. And, of course, I'll continue to try out new gifts on a continuing basis.

Wednesday, December 8, 2010

Buggy Order!

It seems the more the baby buggies are seen, the more popular they are becoming. Diaper cakes are still popular as gifts and centerpieces, but I think that the novelty is starting to wear off. It is hard to attend a shower without seeing one somewhere. So, while their popularity is wonderful, it certainly encourages new ideas and gifts. My buggies got a lot of oohs and ahhs at the craft fair I had participated in and a buggy sale was the only one I made that weekend. They are less common and since they are a little smaller, they fill a niche that was previously void - small, affordable, adorable, and clever.

I recently received an e-mail from a friend wishing for a small cake or gift to act as a centerpiece at a shower. She opted for a buggy. I was limited for time on this particular gift, so it made matching the mom-to-be's character nursery theme a little difficult (most of the character items had to be ordered online). Instead, we decided it would be best to create a basic boy buggy.

I approached this project with the idea that I'd use a basic non-themed design so as not to conflict with the chosen theme. I avoided items with pictures like cars and sports items and selected a simple striped design for the main portion of the buggy. I hand rolled the diapers to form the structure and added the details. To this buggy, I added a teether as well. I printed up character sticker labels which matched the nursery theme to apply to the decorative ribbon around the buggy. This gave it a personal touch for the expectant mom and allowed the additional detail without ordering specially made baby items (since I didn't have the time before the date of the shower) or ruining any of the items included in the buggy.

Overall, I think my friend was pleased. She mentioned that the buggy was for a centerpiece so I asked if she wanted it shrink wrapped. She said to go ahead and wrap it and they could undo it if they felt it would look better as a centerpiece. She picked it up a few days before the shower. I sure hope the expectant mom liked it. I'm happy to get those extra little challenges to see what I can come up with!

Tuesday, November 30, 2010

My First Craft Fair!

I seriously thought I had typed this up already, but apparently, I was wrong. About 3 weeks ago, I participated in my first craft fair with my baby items. I had done this craft fair in the past with my jewelry and dream catchers, but this was the first public event for my baby boutique.

My mom and I had worked this craft fair together for the past 3 years. She had worked it for years before that, but I joined her more recently. I like this one because there is a minimal fee for booth rental and then a portion of your sales goes to help the youth group (the craft fair takes place at a church/private school). If you don't sell much, you aren't out any more than the small investment to rent your space.

We like to set up in booths that run between aisles. This gives us extra space to display our wares, one table on either side of the booth area. One of my tables was dedicated to my diaper cakes and baby gifts.

The weeks preceding the fair, I drove up to the Dallas area where my mom lives and the fair took place. I didn't travel with many diaper cakes but worked on the projects there and ended up with three each of 3-tier cakes, 2-tier cakes, and baby buggies. For each type of baby gift I had a girl, a boy, and a gender neutral gift. I arrived with only the 2-tier gender neutral cake and the girl buggy which was my first inventory item.

I'll give a short description of the items I created for the sale.

Baby Buggies:
The baby buggies are made with hand rolled diapers to make up the shape. A receiving blanket, wash cloths, and burp cloth are added for the outer shape and pattern. Ribbon finishes off the buggies. I have made buggies with extra baby items on them, but all the ones I created for this craft fair were the basic buggy design.


2-tier Diaper Cakes:
I arrived in the Dallas area with a gender neutral 2-tier diaper cake. This cake was a bath themed cake that included hooded bath towels, wash cloths and baby bath items. To add to that, I built two additional 2-tier cakes: one boy cake and one girl cake. The girl cake  was a mint green, pink, and lavender cake that had receiving blankets, wash cloths, teethers, and a rattle included to decorate the hand rolled diaper structure. The boy cake meant entering new territory for me since it was the first time I had incorporated a bottle into one of my diaper cakes. The boy cake included receiving blankets, wash cloths, and pacifiers plus the bottle to decorate the hand rolled diaper base.


3-tier Diaper Cakes: 

I had to start from scratch on my three 3-tier cakes since I didn't even have one to start my display for the fair. The girl cake included the most diapers since the blankets used were larger than standard receiving blankets. Hand-rolled diapers formed the tiers for the cake which were then decorated with the blankets. Teethers, socks, and wash cloths were added and a carrier toy topped the cake off. The boy cake looked to be the largest because the diapers I used for it were size 3. I will typically use size 1 diapers in my cakes, but occasionally there will be a reason to use larger ones and that is what I had in stock. The boy cake, again incorporated hand-rolled diapers that were stacked for the tiers. I had a great set of navy blue blankets for this cake and I love the way they look on the final product. I added socks, wash cloths, baby powder, and a carrier toy to finish the cake. My 3-tier gender neutral cake was the standard green and yellow. Hand-rolled diapers created the structure which was then wrapped in coordinating gender neutral receiving blankets. I added teethers, wash cloths, baby bath products and a carrier toy to finish this cake.

 I was happy with the inventory I created for the craft fair and I only hoped it would be enough. I also brought along with me, my product catalog which demonstrates the other baby gifts I can make and a description of the items typically included in each one. My original plan was to bring shrink wrap with me and package the diaper cakes as they sold. I felt, and still do, that once they are wrapped, it is harder to see the detail on each cake, but that the wrapping is really necessary for the finished look. Since electricity was a potential problem (as in, we may not have any), I went ahead and started wrapping as many as I could. Unfortunately, I had a shortage of the shrink wrap, so only a few of the cakes were done. In the end, I decided it worked out better that way so customers could see the detail on the cakes without the wrapping and how the finished product looked. Each of the cakes was also accompanied by a card that listed the items included so recipients would have that information as well as my information which was printed on the back.


At the fair I felt I had a pretty nice set up. My display took of plenty of space without being too cluttered. I had a lot of positive response for my diaper cakes and multiple people asking for my card. Unfortunately, I didn't have any business card with me, but I figured it was just as well since I wasn't local to the area. Many of those interested loved my work, but said they didn't know anyone who was expecting currently, so I missed potential sales in that respect. I do wish that I had done a little bit better, but most of the vendors had low sales over the weekend. The most popular cake seemed to be the 3-tier gender neutral cake. I sold the boy buggy to a young woman whose boss is expecting a baby. I did enjoy my time there and I definitely hope to return in the future with my diaper cakes. In the mean time, I have a decent inventory in stock ready and available for sale. I also hope to find some local show and craft fairs that I may be able to participate in where I can get my name out, and this time, I have business cards ready to go!

Wednesday, October 13, 2010

In search of diaper cream

My latest order came from a friend who has an expectant cousin. Unable to attend the shower, my friend asked me to make a diaper cake to deliver to the mom-to-be a couple of weeks before her due date as a final, "Surprise! Here are some last minute supplies!"

We experienced a bit of a disconnect when it came to what would be incorporated in the cake, however. The expectant mom wanted some Butt Paste and my friend thought it would be a great idea to include several of the large tubs that are now available. In the structure of a typical diaper cake, there is no place for a tub of diaper cream, let alone several. However, determined to create a gift that my friend would be proud to present, I decided I could use the large tubs on the inside of the cake so they didn't create extra bulk on the cake. There were a few issues with this solution, however. One problem would be the fact that the diaper cream wouldn't be seen. I like for the items in the cake to be seen so you know "what you are paying for" so to speak. Another complication is that with tubs in the center, it would sacrifice the structural support that is typically hidden within the cake. That problem I decided I'd figure out when the time came to build the cake. Yet another problem was the fact that with tubs of diaper cream in the middle of the cake, fewer diapers could be used for the overall structure.

As it turned out, my problems were solved when I went shopping to collect items for the cake. I discovered that the tubs of diaper cream cost a significant amount. Just 2 tubs would use up most of the funds I could put into the materials of the cake and still provide it at a reasonable price for my friend. I opted to pick up smaller tubes of the diaper cream and hope that it would be ok. They did however help inspire part of my color scheme for the cake, giving me a nice yellow to match with the blue that would be used as the cake was for a boy. The cake happened upon a safari theme because of the receiving blankets I used and the carrier toy I selected to match.

The cake was built with hand rolled size 1 diapers (in the brand registered for by the mom-to-be). Receiving blankets created the finished "fondant" look of each of the two layers. Wash cloths, diaper cream, and pacifiers decorated the sides of the cake secured with curling ribbon. The topper for the cake was a coordinating lion carrier toy. I've been doing a lot of double ribbon bows for the main tie around the layers, but I opted for a single decorative ribbon to prevent this cake from being to busy. The wash cloths were a bit of a last minute addition, but I think it balances out the cake.

After completion of the cake, I sent a picture to my friend that ordered it. She liked it and was understanding about the diaper cream issue I had. I delivered the cake a few weeks before the mom's due date and she was, of course, surprised to receive it. I only hope she liked it!

Monday, September 20, 2010

My First Order (Part II)

So, now that I've kept you guessing, I can continue on with pictures and more information on the building of my first order (especially now that the sip 'n' see has passed and everyone that was there has hopefully now seen the diaper cakes).

I'll start with the bouquet. The bouquet created a bit of a challenge as I found that the materials I had did not in fact provide a lot of lavender to go along with the colors chosen for the sip 'n' see. I had black, white, and lavender tissue paper for decorating around the bouquet and created a lavender bow to decorate the vase. The "flowers" however, needed a bit of tweaking to go with the color scheme. I solved the problem adding lavender ribbon to the wash cloths and diapers to bring in the extra color so all but one of the flowers was not white. These all came together nicely in the beautiful vase I had selected. The bouquet included 2 wash cloths, 2 diapers, and 2 body suits.

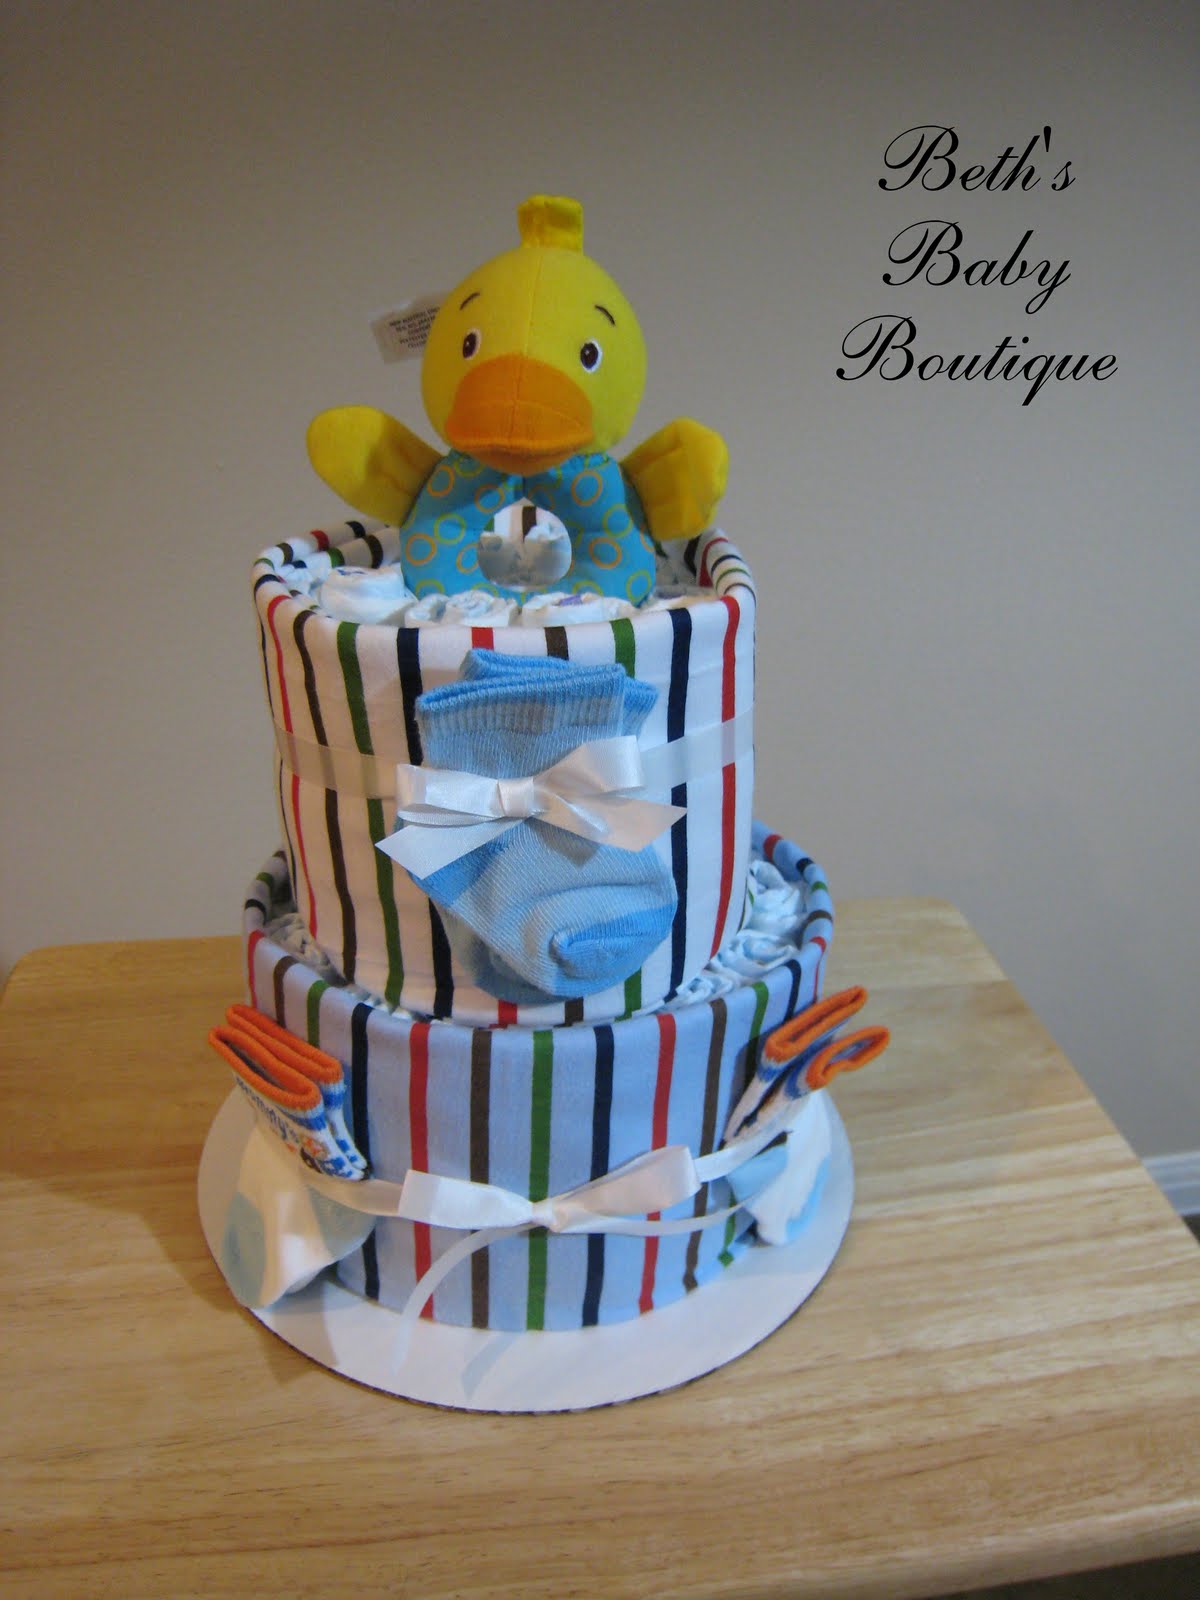
As usual, the cakes started with hand-rolled diapers. Size 3 diapers were selected for this cake since the baby had been born and this provided the mom with some larger size diapers when the baby grew into them. The layers were sacked and the blankets and sheets were wrapped around the layers. The added bulk of the crib sheets meant that to give a better varied layered look, I had to remove some diapers from the top tier, but I left as many as I could so as not to sacrifice the value of the diapers in the diaper cake.

Adding the extra decorations proved a little bit difficult. First, the cakes needed to match. Second, since the cakes were going to be used as centerpieces, possibly at a table where people would be sitting, I needed to decorate them all the way around. While the other cakes I had made were decorated only on the front and immediate sides, this one needed more added touches. Add in the lack of lavender and white items I was able to find and it proved to be quite a challenge.

I improvised a bit and created my first ever hair clips to add to the decorations. These were made with ribbon that coordinated with the diaper cakes. I made four hair clips. 2 each of white ribbon with lavender flowers, and 2 each of black and white striped ribbon. They made a perfect addition to the cakes, allowed me to match the cakes and added to the other decorations.

Another decoration I selected for these cakes was wash cloths. I had seen the technique used on diaper cakes before, but only in pictures and never on an actual cake. The effect turned out quite nice, and I'm likely to use it again in the future. For these cakes, I used two rolled wash cloths which were strategically placed along the seam of the receiving blankets on the lower cake layers. This is how I was able to provide attractive views not matter the angle the party guests were coming from.

I added yet another new decoration to the cake. This one included sock "roses" that adorned the bottom and top layers of the cake. One sock from each pair was used on each cake so the cakes matched. Together, the new mom had a total of 8 pairs of socks. 7 were used as sock roses and the 8th pair was used as additional decorations on the sides of the cakes (one sock per cake). I had used sock roses before in one of the bouquets I had made, but never as a decoration on a cake, but I like the effect it provided.

The cake toppers stumped me since the party was a France/Paris theme, I really wanted to do Eiffel Towers on the tops, but I didn't know how I'd be able to pull it off. Finding Eiffel Tower figurines is not terribly difficult, but most would be too big or heavy to act as the toppers. I also considered doing a small bouquet of sock roses, but I had difficulty arranging them so they looked right. I finally found some paper art that could be printed out and put together and thus, I was able to create the toppers I wanted. It provided and economical and attractive addition to the cakes. I printed it out on card stock so it would be sturdy and then built them up for two 3-dimensional towers. I used a longer dowel rod in the center of the cake than I normally would for a 2-tier cake, but it provided the support for the toppers and with the help of some lavender tissue paper, the wooden rod was hidden from view.

As you can see in the sneak peak from my previous post (as well as here to the side) I also included some extra embellishments in the form of plastic decorative pacifiers on the bows. I typically like to use mostly usable items to decorate the diaper cakes, but used in moderation, these types of additions can really add to the "wow factor". Since I'm constantly trying to add more aesthetic value to my cakes, I am likely to continue using some of these types of small additions in the future.

I used so many new decorations and embellishments on these diaper cakes, that I almost feel like I've reached the end of my creative rope, but I'm hoping that is not the case. I like to think I'm just building my skills for newer projects and improving on what I've done in the past. In the end I was very proud of how the whole project turned out and the friend of mine that ordered them seemed to really like what I had done. I asked for some pictures of the cakes at the event so with any luck, I can post some to see how they worked in with all the other party decorations. I hope they were well received by the guests and especially the new mom.


Here is the entire "collection" - the two cakes and the bouquet.

Wednesday, September 15, 2010

My First Order (Part I)

Not long after I set up my Facebook page and completed my big baby bouquet I received my first ever order. And it wasn't just a simple cake. This was a big order. I was super excited.

A friend of mine was planning a sip 'n' see for mid September and wanted two 2-tier diaper cakes for a large table and a bouquet for the guest book table. She wanted the cakes to be a low enough height that they could be seen over. The theme for the party was a French/Paris theme with the colors lavender, black, and white.

I was so excited and instantly had my ideas for the cakes. All it boiled down to was whether or not I could find the materials. I wanted to use lavender receiving blankets for the layers and decorate the rest of the cakes with lavender and white baby items. Black would be incorporated with the decorative ribbon, as finding baby items that are black is a difficult task.

Little did I know that finding lavender baby items seemed almost as difficult. This confused me a bit, since when I think of baby girl items I automatically think of pink and purple, but to my surprise, it is harder to find a large number of purple items than I originally thought. Most can be found in various shades of pink, even teals and mint green, but rarely purple. After much searching, I was finally able to find items that worked for the cake including receiving blankets, crib sheets, pacifiers, wash cloths, and socks.

Building the cakes came with its own challenges. I'd never worked with crib sheets before. They are thicker and more flexible than receiving blankets so it is a bit more difficult to give that smooth finished appearance that the blankets provide. Also, I needed to make both cakes the same, so balancing decorations and paying close attention to detail was a must.

I'll give more detail and provide many more pictures in the second part of my description of my first order, but for now, here's a bit of a teaser. A glimpse of part of the finished product:

Friday, September 3, 2010

A New Kind of Bouquet

With yet another expectant mom among my friends, I had another project ahead of me. I was asked to make a centerpiece for her shower and I was happy to oblige. This time, however, I decided that rather than make a diaper cake, I'd make a bouquet to go with the theme of the shower which was roses to welcome the baby whose middle name was to be Rosalinda.

I wanted to make a large bouquet as it was to be a centerpiece. I was excited to pick out some girl items (this was my second diaper gift for a girl) selecting purple, pink, and white socks to make roses, as well as purchasing diapers and wash cloths to make additional flowers.

To assist with the size of the bouquet and to add value, I decided the basket would be made of diapers rather than just purchasing a basket. I hand rolled the diapers and wove them together with pink ribbon to form a ring. I used a cake board as the base. I lined the inside of the basket with tissue paper, opting for purple to counter balance the pink ribbon in the basket, and then filled the inside with shredded paper in several shades of purple and pink and white. I then pieced together the bouquet of "flowers". With 6 pairs of socks, 6 wash cloths, and about 9 diapers (not counting the basket) the bouquet was rather large. During the process of building this bouquet, I did have to go through a little bit of trial and error to get the look just right. The diaper "flowers" had curling ribbon to spruce them up a bit and green ribbon was tied to the "stems" of several of the other "flowers" to give the appearance of leaves. The extra embellishments were well worth it, but I think they may have gone unnoticed because of the size of the bouquet and the presence of the tissue paper - basic visibility problems.

In the end, I was happy with the final result. I think if I repeat this concept of the diaper basket, I may make some alterations, but otherwise I was pleased. The expectant mom seemed to like it, so that is what matters in the end.

Tuesday, August 31, 2010

Diaper Cakes with a Twist

With another friend expecting in August, I was lined up to make another diaper cake. This one however, had a different progression. I learned through a friend, that she and one of the hostesses for baby showers for this expectant mom were planning on making diaper cakes for her for her showers. This presented a little bit of a challenge for me. While diaper cakes are almost always welcome, I was a little worried about the novelty of the gift wearing out if mine was the third to be received. I felt I needed to do something a little different.

I developed a new concept for a diaper cake. This cake would be a sheet cake with a buggy topper. I started my search for supplies using the registry as I usually do. One of the items was actually a set of receiving blankets, two of which were the same pattern. This was vital for the cake as I'd need two  blankets for the surrounding decoration on the cake.

Hand rolled diapers provided the sheet cake. I was surprised at the number of diapers necessary to create the size of cake I was aiming for. Now, the cake didn't have the sharper corners I would have preferred to make it look closer to a real sheet cake, but it looked ok. I used two matching blankets for the edges of the cake and a third coordinating blanket for the top. The buggy was then formed to top the cake, using hand rolled diapers, a blanket, a burp cloth, and some wash cloths. Ribbons were then tied around the edges of both the buggy and the cake for embellishment. A pair of socks was added to the front of the buggy for an additional touch.  I used extra ribbon and tulle for the cake and kept it simple on the buggy topper.


I was really proud of how this cake turned out. It may not appear that way, but this cake took more supplies (at least 1 extra blanket and more diapers) than most of the others that I've made. This is a little unfortunate because for future purposes, it may carry a higher cost than more ornate diaper cakes. Aside from that, I was happy to be able to present a unique style of diaper cake as well as give items that were part of the registry. This made a fantastic eighth cake to add to my repertoire.

New Gift Ideas

After successfully making several diaper cakes, I decided to see if there were other things that I could make using the same concept. Many people may not need that large of a centerpiece or they may need a gift that isn't as costly as a large diaper cake. Using inspiration from Internet searches and gifts that others had made (I firmly believe imitation is the highest form of flattery), I created a few new gift ideas that I could make.

The first was a baby buggy. Now, the buggy that I developed is a little bit different than other's I've seen. I think it is a larger structure and maybe I'll look into a mini buggy, but for now, I'll make them as I have them. The core of the buggy is formed of hand rolled diapers. The internal structure is secured before adding the decorations so that it will stay intact. A decorative receiving blanket surrounds the outside of the buggy. A burp cloth or pre-fold cloth diaper creates a blank surface so the diapers are covered on the inside of the buggy. Wash cloths act as the baby blanket and cover the hood of the buggy. Ribbon is then tied for decoration. This pink girl buggy became my first inventory item for my baby boutique.

The second idea was bouquets. I've seen many variations and these gifts have a lot of options. In my bouquets I've incorporated hand rolled diapers to keep with the idea of diaper gifts. Many baby items can be used to create the "flowers." In this first small basket I put together, I used hand rolled diapers, wash cloths, and bath products. Curling ribbon adds a little bit of extra visual appeal. The basket is then embellished with ribbon and a bow. Inside the basket I used gift basket paper to help hold everything together. While not intentional, this bouquet ended up with a kind of bath theme with the wash cloths and bath products. This basket was primarily for practice. It was disassembled after the pictures were taken. I felt I needed the exercise my skill and wanted to have a visual of how it could look.

A third new concept is a candy dish. For this, various baby items are rolled or formed to create a piece of "candy" and wrapped in cellophane. The items are then placed in a shallow bowl, decorative tin, or large candy jar. I'm still working on developing this project and have only been moderately happy with the outcome of my first attempt at this gift. It does have great potential, so I am hopeful when I try it again.

I'm still pondering new creative ideas for diaper gifts and other baby gifts that I can incorporate into my boutique. I'll probably never stop looking for new ideas, it's just part of my nature.

Monday, August 30, 2010

In New Territory

My seventh diaper cake, similar to the one before, was assembled long before it was actually presented to the expectant mom. It did, however, make it to the mom before the sixth cake was given to the mom and unlike the previous cake, was given before the baby was born. Again, with this cake I entered into new territory.

The expectant mom for this cake was again for a mom that I'd never met. I had spoken with her once on the phone. My husband knew her husband and I had met him and talked to him on several occasions. They are a very nice couple. I started my search for items for the cake like I start most of my searches, with the baby registry. The registry helps me to identify items the expectant parents like; and, if I'm lucky, I can incorporate registry items into the cake as well rather than simply using their influence. This registry provided the perfect addition to the cake - two multipurpose waterproof pads. The pads, which I had never seen before were reusable, and roughly the size of a receiving blanket. These would be just the thing I'd need for my layers. I selected a rattle topper that matched the safari theme and with a few other items I was set.


Hand rolled diapers provided the base for the tiers of the cake. The multi-use pads were a bit harder to work with than receiving blankets or towels as they were much more structured and thicker. I did manage to make them work. Another new thing I did with this cake was use tulle and ribbon for the bow. The tulle provided its own  difficulties, but it fluffed up nicely. I had to add extra ribbon to balance out the extra fluff of the tulle. I attached teethers to this cake in the same manner as the previous one adding curling ribbon for an extra touch. The giraffe rattle topper worked perfectly with the safari pads and was easy to secure among the diapers of the top layer.

This cake had the most punch when it came to decorations by far. The decorative aspect is one I'm still working on. This cake could theoretically be a gender neutral cake, but with the blue ribbons and teether, the scale is slightly tipped towards a boy cake. I was lucky enough to receive an invitation to a shower for the expectant mom which allowed me to not only meet her, but bring the cake to her in person. Another diaper cake was at the shower, but it was set on a side table and unfortunately did not get the exposure it deserved. I suppose that allowed my cake to get a bit more attention when presented as the gift, so I'm not really complaining.

Matching Colors

As it turns out, another friend of mine was due with a baby in June. We may not live that far from each other, but her hectic schedule as a pediatrician makes getting in touch difficult and getting together even harder. Now, when I was up in Dallas over Christmas, my sister made a mention that she was pregnant (they were best friends in grade school), but I didn't think much of it and figured I'd hear it from her directly. We did finally get a chance to talk and she let me know she was expecting. She was about twenty weeks along! We really should do better about getting together.

I wasn't sure what direction to take with her cake, so I checked the registry and asked about her color choices for the baby room. She had selected turquoise and lime green with hints of tangerine. I was a little nervous about my ability to match this color scheme and set out to see what I could find. The first and easiest thing to find was the a lime green receiving blanket. As luck would have it, there was a coordinating white blanket with turquoise, lime, and tangerine spirals on it. I found some matching wash cloths and other accents and I was good to go. The ribbon for wrapping the cake was much easier to find as the color variety is much wider than on baby items.

I hand rolled the diapers and began assembling the cake. The receiving blankets were wrapped around the bottom and middle tiers and two wash cloths covered the top tier. I used two different sized ribbons to tie around the tiers using the colors she chose to pull it all together. The topper, a duck that hangs from the carrier handle, was secured in place by the hook. I added teethers (again, in matching colors) as final embellishments attaching them with coordinating curling ribbon. This was a new technique that I was trying out and I think it worked quite well.

This finished cake, I feel was my best to date. I really like the look of the additional ribbon and I feel it gives it the aesthetic boost that my previous cakes were lacking. Another difference is this cake was made with size 2 diapers. For the most part, it doesn't really make a difference, although, given the fact that it took so long to actually present this gift (the baby was about 8 weeks by that point) it worked out quite well.

Sunday, August 29, 2010

Move Over Boys

Along with all of the other people I knew that were expecting, I kept finding out about more. A friend and former co-worker from the city I was living in before I got married was due in March 2010. I was so excited since she was having a girl. That meant I could test my skill at a girl cake!

Without knowing when I'd be able to visit or take the two hour trip to see her, I was still determined to create a cake for my friend. I focused on choosing the decorations for the cake and selected a set of polka-dot receiving blankets which I was sure she'd love... I hoped. I had a bit of trouble finding a topper for the cake, but finally landed on an adorable disposable diaper bag dispenser with a duck on it. It would be perfect and easy to mount on the top of the cake.

Hand rolled diapers made the tiers of the cake. The blankets surrounded each of the three layers of the cake. I incorporated travel bath products into the layers. The duck bag dispenser worked perfectly as the topper and hidden from view was actually a refill roll of bags in addition to the one pre-loaded into the dispenser. Polka-dot ribbon was tied around each of the layers and finished with a bow. Four pairs of socks finished out the decorations on the cake.

I was so happy with the finished cake, and I hoped that the expectant mom would like it as well. I did get an opportunity to go down to see her, in fact, I was invited to several showers and selected the one that worked best for my schedule. The shower theme was zebra and hot pink, a combination which the expectant mom loves. I only wish I had known that as I could have tried to make the cake match, but oh well. They had a beautiful 4-tier diaper cake as a centerpiece for the desert table that matched the theme perfectly, so she received at least one cake with this favorite combination of hers.

Since then, I want to say in the past couple of months she started her own business with a friend called Baby Kakes by BFF. They can be found on Facebook and are a College Station local business.

2-tiers for a Change

Shortly after moving into our new home, we learned that one of the neighbors was expecting. All I knew was that her baby was due at the end of December 2009. I received regular updates from her hubby about her condition as I, having recently been in the same position wanted to see how she was doing. I wanted to be neighborly, even though I'd never spoken to the expectant mom, and decided I'd make a cake for her. I did know she was expecting a boy.

Some time around January or February 2010, I heard news that she had the baby several weeks prior and decided I needed to get to work. I went ahead and gathered items for this diaper cake, boy socks, boy receiving blankets, etc. and planned it out. I was going for a sort of sporty look for this one even though there was no real theme to it.

I opted for new territory and made a 2-tier cake this time. Two striped receiving blankets covered the rolled diaper tiers. I chose a stuffed duck rattle for the topper. The topper did provide a bit of a challenge, as it didn't like to stay stable, but I finally figured out a way to keep it in place. Ribbon was wrapped around the layers and I finished it off with several pairs of socks. This cake was also shrink wrapped and tied with a bow for its final presentation.

I absolutely loved the striped receiving blankets which were purchased separately but coordinated beautifully. I also think that this cake was wrapped the smoothest of any that I'd made previously giving very clean finished lines. I was proud of the way this one turned out. As an added bonus, I finally got to meet the new mom and the new baby when I brought the cake to her and her husband!

Saturday, August 28, 2010

My First Boy Cake - And It Comes With a Theme

My third cake proved to be a bit of a challenge. The mom-to-be was  friend from college that had thrown me one of my showers. She was expecting her second boy. The boy part isn't what got me. It was the fact that the baby was her second. Now, a lot of times showers are avoided altogether for a second baby, especially when it is the same gender as the first. But really, why turn down the opportunity to celebrate? Besides, every baby should be celebrated. Maybe it's just me.

In any case. It is a particular challenge for the second boy because I wanted to provide on the cake things that the mom would actually be able to use and items that were consumable. The diapers were obvious, but what else could I do? I settled on a bath themed cake because I figured bath products get used up. The problem was, those only ended up making up a small portion of the cake and I still had decorations to incorporate. So, maybe I was successful at duplicating some items she already had, but oh well.

So, again, rolled diapers created the tiers. Hooded towels were wrapped around the bottom and middle tiers. Two wash cloths made up the covering for the top tier. My topper was formed with three wash cloths, two blue and one yellow and tucked into a teether to resemble a flower. Yeah, it was for a boy, but hey, it was blue. Ribbon was tied around each of the layers. To finish off the cake and add some more color, I added three more wash cloths and of course, the essential bath products. The finished cake was, of course, shrink wrapped and tied it with a bow.

Over all, I think the cake looked great. I do wish I had been better at incorporating items that were consumable that maybe she wouldn't have left over to pass along from the older brother, but that's okay. With two boys, I hope she found use for all of the wash cloths!

Friday, August 27, 2010

Cake Number 2!

Not long after I created my first diaper cake, I had another to make. This one was for my brother and his wife who were expecting a baby in January. So, I put together a diaper cake for them and brought it with me when we traveled to the Dallas area for Christmas 2009.

I knew that my sister-in-law was planning to breastfeed, so I based this cake on that and decided to incorporate some items that are useful for breastfeeding like breast milk storage bottles, a microwavable steamer bag for sterilizing the bottles, and some lanolin - a must for breastfeeding moms.

They also decided to wait and be surprised as to the gender of the baby, so this cake had to be a gender neutral cake. I collected receiving blankets, burp cloths, and spoons to go along with the bottles and lanolin to create a feeding-time cake.


I rolled the diapers and started to stack the cake. This cake had receiving blankets on the bottom and middle tiers. A burp cloth covered the top tier. Two more burp cloths were draped on the middle and lower tiers. The bottles were added in place of some diapers within the tiers and positioned so they were visible - unfortunately, the bottles were wider than the diapers and made the cake a bit lopsided. I added baby spoons to the tiers and finished the tiers with ribbon. The tube of lanolin became my topper and the microwave steamer bag was hidden under the cake. The final touch was added by shrink wrapping the whole cake and tying the wrap with a bow.

I was happy with this cake; and (sorry to my BFF), I felt this turned out better than the first one. My only complaint is the misshapen appearance giving by the bottles. I think in the future incorporating bottles will have to be done differently. I have yet to add bottles to other cakes I have made, but this is largely due to cost. You wouldn't think it, but bottles can get expensive!

Thursday, August 26, 2010

The adventure begins

"Way back" in June of 2009, I received my first diaper cakes as gifts at a baby shower that was thrown for me by my sisters. I received two cakes, one was a blue and brown 3-tiered cake and the other was a blue and white 3-tiered bath-time cake. I thought these were the cutest, most creative baby gifts I'd ever seen. I was hooked.

It wasn't until I got into making them more and more that I realized how popular they were, after all, I had only been to a handful of showers, but I'm learning that they are super popular now and there is an insane amount of competition when it comes to diaper cakes. There is hardly a shower these days that doesn't include a diaper cake somewhere. But I digress.

In any case, I had learned several months before my shower that my best friend (and the matron of honor at my wedding) was expecting as well. Her baby was due in December. After carefully taking apart the diaper cakes I had received, I figured I knew how to duplicate the process to make them myself. I had high hopes of making them for sale but I figured I'd start out making them as gifts for friends that were expecting to tweak any problems and build up my skills. My best bud would be the first guinea pig.

The first thing I did was check out her registry. After all, I figured that if I could use items on the registry to incorporate into the cake, that would make it all the easier; and, she'd receive things she had picked out. I still use this tactic. When shopping, however, I was a bit disappointed. I found it difficult to find many of the registry items at the stores, but thanks to the wonders of the internet, I was at least able to see the pictures on the store websites and I noted that she had selected many items with forest creatures and the color green. She knew she was having a girl and this was the theme she selected for the nursery. Super cute!

I tried to find alternate items that would at least coordinate with her color scheme and theme, selecting some booties, a hat, receiving blankets, and a sleep gown. I then started putting the cake together. I started rolling the diapers and securing them (at the time I used yarn, I've found curling ribbon works better). I used the cake board that I had received one of my cakes on as the base. The cake was stabilized up the center with a receiving blanket and the sleep gown, so unfortunately, those weren't visible on the finished cake. Receiving blankets provided a smooth "decorated" side to the bottom and middle tiers. The top tier held the hat and white satin ribbon was secured around the layers. Finally, the booties were added to finish the project.

I was happy with the end product and my friend seemed to really like the cake which makes it all the better. I've learned a few new tricks since then, but I believe it was a great start to this new endeavor of mine.

Welcome!

Welcome to my blog! Over the next several days, I'll post about the various baby gifts I've made that have become part of my repertoire for Beth's Baby Boutique. I'll add pictures so you can get an idea of what I've done and what is possible. I hope you will visit the website and see more pictures and get ideas for baby gifts you may want to order. Let me know if there is any way I can help: bethsbabyboutique@hotmail.com